About This File
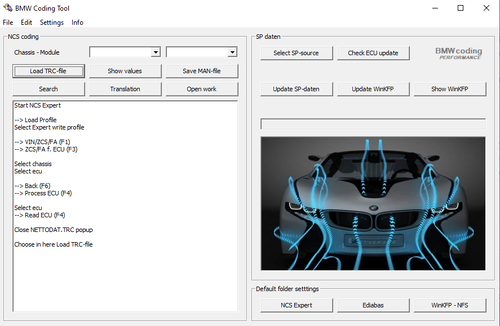
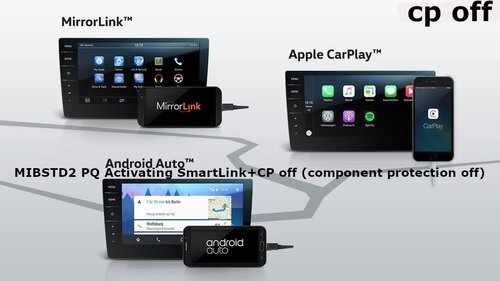
Activating voice control.Apple CarPlay.Google Android Auto. cp off, patch.updating the firmware of MIB2 / MST2 Delphi
To activate the voice assistant you need:
- Laptop
- VAS5054, VASYA or something that can change the encoding in the block
- SD card
- USB network card D-Link DUB-E100 b1, c1, d1 (E - does not work, checked)
- Time
- A little courage, because having failed or done something wrong, get ready for the expense of $ 400 +
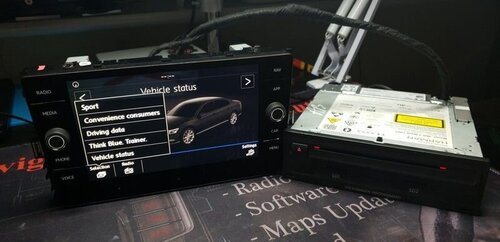
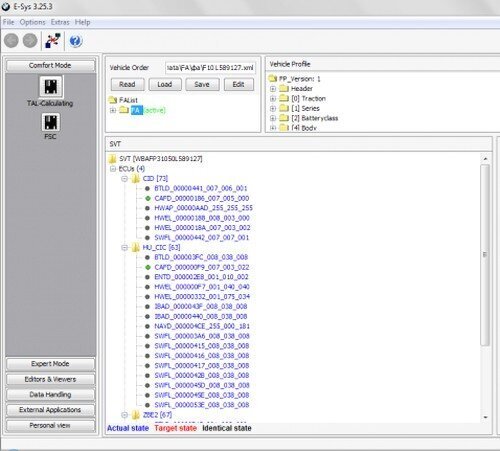
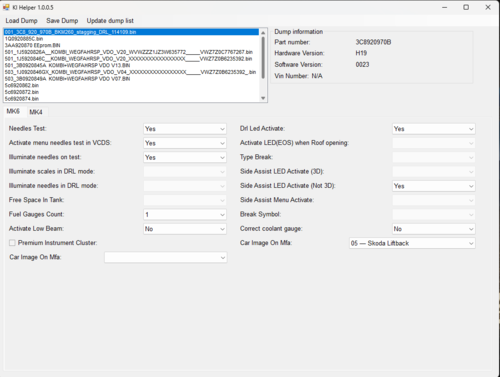
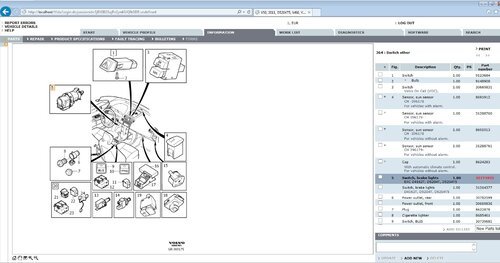
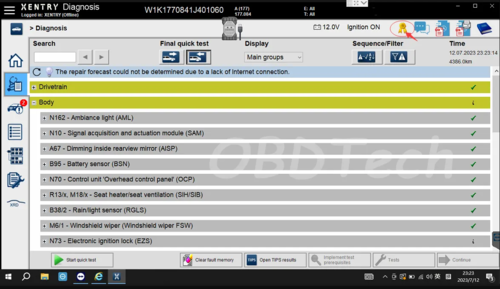
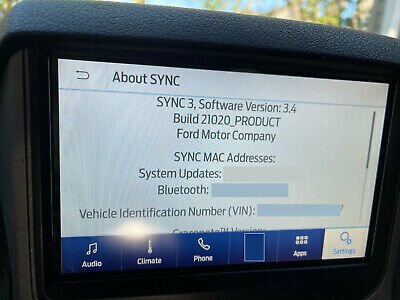
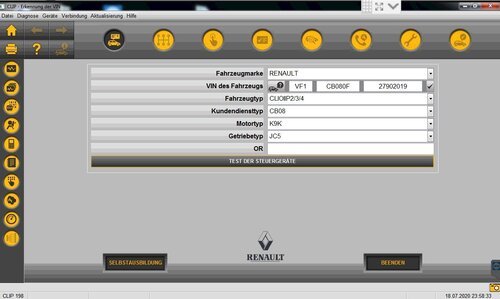
1) The first thing to do is to check that you have the Delphi module.
To do this, you need to hold the "Menu" button on the GU (head unit) for a few seconds, after which you will go to the service menu, where the "Update" section you can see the current version of your module and the type of module.

From the photo you can see that I have a Delphi module, because in the line "Train version of the installed software" at the end is put "D"
Decoding:
MST2 = MIB2 standard deviceEU
= European versionVW
= carP0890
= Firmware 0890D
= Delphi Unit
If there is a letter D at the end of the SW Train version, then you have a Delphi module.
If you see the PQ or ZR after the make of the car or the letter T at the end in the SW Train version, then you have a Technisat Preh device.
2) Updating the module from 0890 to 0891The

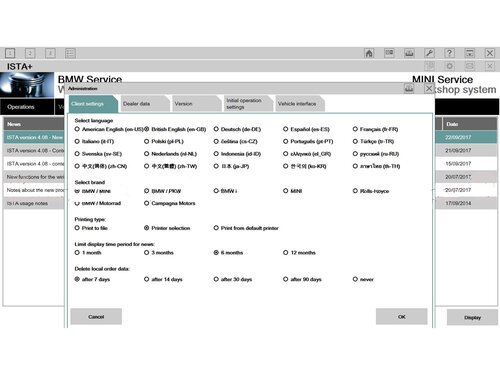
3) Activation of "Green Engineering Menu" in the service menuTo
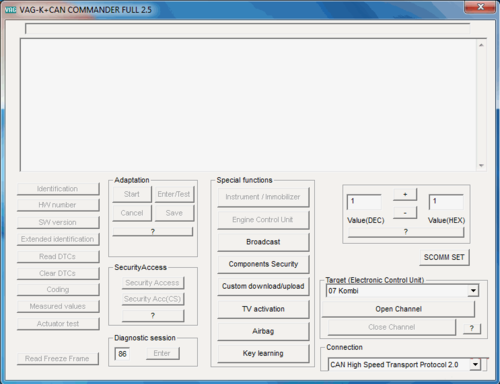
do this, take the wire (In my case, Washu), go to Block 5F → Adaptation
> Developer mode → activate
login-password 12345

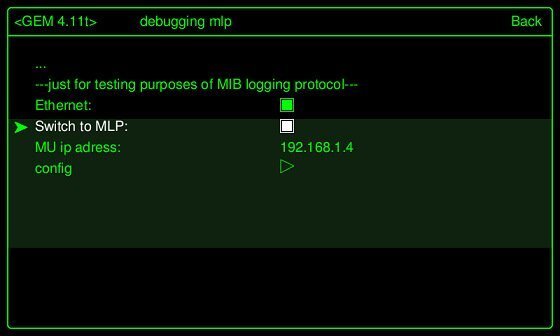
4) Activate Telnet connection to connect USB network cardAfter
performing steps 1,2,3, you need to enable Ethernet.
To do this, go to the service menu, then to the → "Green Engineering Menu", then → "debuggung mlp" and select the "Ethernet" item.
After execution, it is necessary to reboot the GU, done by holding the shutdown button for at least 10 seconds.
After rebooting, go back to these partitions and tick the "Switch to MLP" section.

5) Set up an Ethernet connection and check the correct connection
Now you need to establish a connection between the GU and the laptop, for this it is necessary that the PC is in the same subnet with the GU.
Connect our USB network card to the GU auto and to the PC and make the following settings:


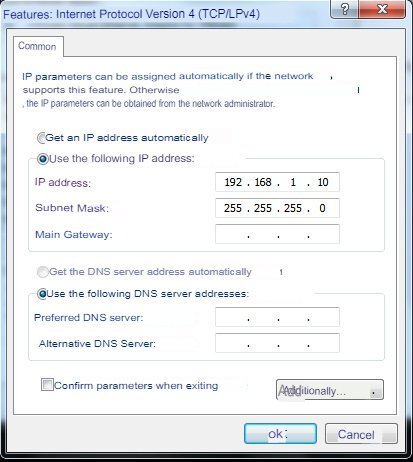
If everything is done correctly, the green LED on the adapter will light up.
open puty
Start and configure the connection:
the IP address is taken from the green menu, usually by default 192.168.1.4 with port 23.
Next, connect and see the login request.

Only the "root" user is required to log in to Delphi Units.

6) BACKUP
This procedure can be divided step by step, but everything was done for us a long time ago and everything will be done very simply!
Take the script MST2_backup.sh and copy it to the root of our pre-formatted SD card in FAT32. Insert the card into the slot under the glove compartment cover, wait for gu to say that it has read the card.
Next, in PuTTy Mount the SD card with the command:
cd / && mount -uw /sdc1/
Should see:
# MST2_backup.sh
ROOT access — OK
Making backup dir on SD Card — OK
mkdir: /sdc1/backup: File exists
SWaP *.fec files backup — OK
backup /ffs/etc/* — OK
cp: Can't create FIFO file (/sdc1/backup/script.fifo)
delphibin.ifs backup — OK
InstallationManager backup — OK
SWaP engine backup — OK
cp: Dest (/sdc1/mst2_patch.sh) must be a dir to copy dirs or multiple files to it.
profile backup — OK
MHConfig.cfg backup — OK
fs0 backup — OK
Saving unit info to file — OK
emmc serial numbler — SAVED
FINISHED — You can now remove SD Card
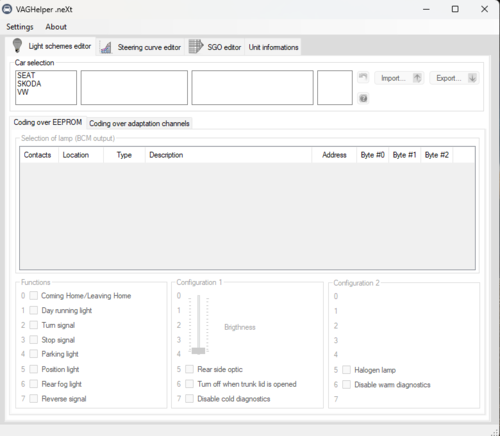
7) Fix FEC.Patch FEC codes
Remove SD card and put it back into the laptop. Go through the backup/pg path where our current file with the *.fec extension lies.
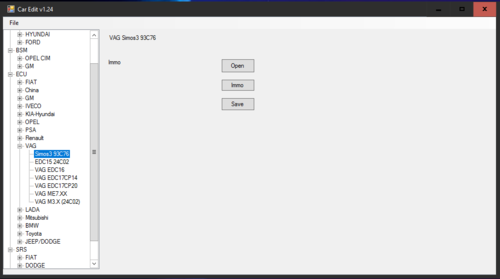
You can correct the FEC file with MIB2 Delphi FEC Generator from XTR3M3
It is important when fixing a FEC file to note everything, not only what you plan to activate.
Next, we throw the corrected file into the root of our SD card.
fsc = "00030000" # AMI
fsc2 = "00030001" # Gracenote
fsc3 = "00040100" # Navigation
fsc4 = "00050000" # Bluetooth
fsc5 = "00060100" # Vehicle Data Interface
fsc6 = "00060200" # Skoda/Audi Connect, VW CarNet
fsc7 = "00060300" # Mirror Link
fsc8 = "00060400" # Sport HMI
fsc9 = "00060500" # Sport Chrono
fsc10 = "00060600" # LogBook
fsc11 = "00060700" # Online Services
fsc12 = "00060800" # Apple CarPlay
fsc13 = "00060900" # Google Android Auto
fsc14 = "00070100" # SDS
fsc15 = "00070200" # SDS for Nav
fsc16 = "00070400" # Digital Voice Enhancement
 Activation of SWAP codes with fixed FEC and Patch FEC codes.
To download the SWAP code you need to take the desired file, each SWAP belongs to the type of your
DWONLOAD SWAP:
STD2PQ
STD2
NAVPLUS
Next, insert the SD card into the car and make the following commands in PuTTy:
Mount the SD card
cd/ && mount -uw /sdc1/
Run the script (MST2_patch.sh)
cd / && /sdc1/MST2_patch.sh
Should see:
# mst2_patch.sh
ROOT access — ok
SWaP patch — ok
cp: Copying /sdc1/SWaP to /home/mmc0t177_tmp/apps/bin/SWaP
100.00% (xxx/xxx kbytes, xxxx kb/s)
FINISHED — You can now remove SD Card
.jpg.70943ee2eb9d5ccc7a8a9c0745588ab6.jpg)
Reboot the radio with a long press on the power button - NECESSARILY!
After turning on the radio, you need to patch, for this in PuTTy:
Download the script MST2_fec.sh.
Mount SD card
cd/ && mount -uw /sdc1/
Should see:
# MST2_fec.sh
ROOT access — ok
*. FEC installation — okmkdir
: /home/mmc0t180_tmp: File existsFINISHED
— You can now remove SD CardReload the receiver with a long press on the power button —
NOTE
some reason it did not work, then you did not fit the SWAP file, try another SWAP
It may happen that FEC files are still in the buffer in the device and are still available after a reboot.
They may need to be deleted several times until they are no longer available on the device after rebooting.
rm -RVf /Persistence/SWaP/ppw/
rm -RVf /Persistence/SWaP/illegal/
You can then import the corrected FEC file.
cp -VRf /sdc1/*.fec /Persistence/SWaP/pg/
After entering the commands, a full reboot is required.
After all the steps, be sure to check the health of the GU.
Check the scanner for errors, and remove them if they appear.
Command:
cp — copyrm
— deletechmod
— change permissions (e.g. chmod 777 = full read/write permissions)
mkdir — create directory (folder)
mount — mount pathumount
— unmount mount path
Attributes:
-f - Forced (Overwrite /Forced)
-R - Recursive (e.g. content folder and copy/delete subfolders)
-t - Mount Request / Special Type (e.g. followed by qnx6)
-u - Update (Remount)
-V - Progress
Bar-w - Read/Write Permissions (when mounting)
HOW TO DOWNLOAD 


![More information about "Bosch ESI[tronic] 2018.1 (A1, A2, B1,) + KEYGEN Full"](https://lymuna.org/uploads/monthly_2023_11/BoschESItronic2018.1images.thumb.PNG.a02f4bb8f9e404258e4fccc5753b5ec7.PNG)


![More information about "TUN FILES BMW MERCEDES [MODE + ORIGINAL]"](https://lymuna.org/uploads/monthly_2024_06/easy.thumb.jpg.84a0820ddfc499aaca6d90c47d0c2c56.jpg)


![More information about "Hyundai Global Snap-On EPC5 3.10.6 Multilingual + Medicine [Multi Language]"](https://lymuna.org/uploads/monthly_2024_05/_7dd52fff23ec6ccabefee1148c230282.thumb.jpg.058002230cf457a7ca67a952c70f17e6.jpg)
![More information about "Liebherr Lidos EPC Parts And Service Documentation Offline [12.2021] VM"](https://lymuna.org/uploads/monthly_2024_05/04.thumb.png.4f22a7e8e7db02d4dcb728c7c3ce0962.png)


![More information about "MMC Mitsubishi ASA All regions 1.8.0.0 (April 2023) [Multi]"](https://lymuna.org/uploads/monthly_2024_05/Screenshot2024-05-04094525.thumb.png.8a73f278e61b71c423db244ba77bd524.png)


![More information about "Scania Multi 05.2023 23.50.0.5 [Multi + RUS]"](https://lymuna.org/uploads/monthly_2024_01/TrDgiNu.thumb.png.72566d67c6414961c5eef5906632c782.png)


.thumb.png.c2fb23c464741f1e08c92fba16eb592c.png)

![More information about "GM GDS2 v22.5.03.300 + DPS 4.52.2000 + Tech2Win [2023]"](https://lymuna.org/uploads/monthly_2024_01/4d2e54b52cf027df5f2bd8d8bb361f3f.thumb.png.ba100ebb7af9dc01dca4f9ac7232f6ed.png)

.thumb.jpg.c6458e5414b704e925cd5eb6793d03cd.jpg)


![More information about "Komatsu EPC Linkone 5.11 EU [03.2020] + USA [04.2020] + JAPAN [04.2020] Full Offline"](https://lymuna.org/uploads/monthly_2023_11/Komatsu_EPC_Linkone_CSS_Parts_Vewer_511_102019JAPAN2-2.thumb.jpg.7dfaf7ae5624294aaa4847c2fe614ba5.jpg)


![More information about "XENTRY XPT FULL FIX & XDOS [23.6.3 & 23.9.1] [v1.4] [UPDATED 27/07/2023] + Xentry Passthru"](https://lymuna.org/uploads/monthly_2023_07/ll.thumb.PNG.b7175cce2422125596a511eec04ed363.PNG)


![More information about "VAG IMMO OFF [KSG DUMP TOOL]"](https://lymuna.org/uploads/monthly_2022_11/Capture.thumb.PNG.e9e5f2aa25218650690f9c7f8f67ddb5.PNG)


![More information about "Internet Download Manager 6.41 [REPACK]"](https://lymuna.org/uploads/monthly_2023_07/downloadmanger.thumb.PNG.f5d3006146d01efafab2be851d60c918.PNG)
![More information about "Revo Uninstaller Pro Final Version 5.1.7 + Portable [REPACK]"](https://lymuna.org/uploads/monthly_2023_07/REVOure.thumb.PNG.946e58c0e0f91eab1a289981f91234e2.PNG)
![More information about "Isuzu Diagnostic Service System (New US IDSS ) [02.2023] + KEYGEN"](https://lymuna.org/uploads/monthly_2023_07/DSDGSDGGD.thumb.PNG.65b4553994e017084b3b7b2147cb2050.PNG)
![More information about "Orange 5 Scripts Calculates [AIRBAG_DASH_IMMO_AUTORADIO_MOTODASH]"](https://lymuna.org/uploads/monthly_2023_07/s-00.thumb.png.eb2405372cd4da34b38cf2bd1b61d9cb.png)


![More information about "ISTA DB LANGUAGE PACK [ SQLiteDBs CZ DE EN ES JP PL RU ZH]"](https://lymuna.org/uploads/monthly_2023_06/lang.thumb.jpg.839957694ce3cc6a1fe9b49ed3d11520.jpg)


![More information about "VIIPlusLoader 08.023.05-FULL +SETUP VCDS 23031[MULTI LANG]"](https://lymuna.org/uploads/monthly_2023_06/TRTLYMUNA.thumb.jpg.f563b8dd8eff2b33dd0aab40bfd47aa9.jpg)


.thumb.jpg.6cf06629f864822393012be1bcdca9ca.jpg)
![More information about "HPT Tune Repository 3500 FILES [1997/2018]"](https://lymuna.org/uploads/monthly_2023_05/Capture.thumb.PNG.4952bb41d4a0f784c43b4abb4a4b4136.PNG)


![More information about "chip tuning Cars Files update[2017/2018/2019/2020/2021/2022/2023]"](https://lymuna.org/uploads/monthly_2023_05/easy.thumb.jpg.85ef51139f7796fc9c2e5dd267603238.jpg)


![More information about "VAG dataflash 23.03 [2023/07.03]"](https://lymuna.org/uploads/monthly_2023_03/8df4d4b3b38bfc72bf84965f697a2743.thumb.jpg.46d6220cf73fbe07b4ec5e64d803cc5b.jpg)
![More information about "ODIS Service 11.0.0 + PostSetup 110000.301.20 + Patch [02.12.2022]"](https://lymuna.org/uploads/monthly_2023_03/APwHWbRgba3n-NLi0afIvezgTuw-960.thumb.jpg.7ac4d2238952525922b7020d8423c317.jpg)

![More information about "VW MAPS [ Audi RNS-E] [Discover Media 1] [Discover Media 2] [MIB1-MIB2] [MIB2P[RNS2-MFD2] [RNS310][RNS315] [RNS510/RNS810] [RNS850]"](https://lymuna.org/uploads/monthly_2023_03/MAPS.thumb.png.fb8b10376ad06624786a23cb6b737520.png)

![More information about "GPS EASY LINK [MEDIANAV4]+ ALL FIRMWARE NAVI"](https://lymuna.org/uploads/monthly_2023_02/Capture3338.thumb.PNG.b4e9c3f9bdd072834192a40f15166cdf.PNG)
![More information about "Firmware Verified [immo off][stage1,2,3][oroginal file] dpf,egr off]"](https://lymuna.org/uploads/monthly_2023_02/carecu-2-22ceff.thumb.jpg.25baae4d95feaca1779499d6c7dbe498.jpg)
![More information about "IMMO OFF FILE PACKAGE [DATABASE] FOR ALL BRANDS"](https://lymuna.org/uploads/monthly_2023_02/Capture22.thumb.PNG.8c52bd277c986a84695845209a962029.PNG)

![More information about "Toyota all packages [FIRMWARE/BONUS][EGR/DPF OFF ] [STAGE1/STAGE2]"](https://lymuna.org/uploads/monthly_2023_01/88888.thumb.jpg.2578a9b0a8aae7ed86076c5bbf5a8caa.jpg)

![More information about "Ford Transit 2.2TDCI 2.4TDCI Visteon DCU-102 (DCU101-106) R-Lab 2017[EGR/DPF] OFF"](https://lymuna.org/uploads/monthly_2023_01/Capture.thumb.PNG.61a42b8255d09132a6aaca9ea28198af.PNG)
![More information about "Denso CAN 1gen (special project) --- Toyota, Lexus (gasoline) 2017-2018 [STAGE1]"](https://lymuna.org/uploads/monthly_2023_01/easy.thumb.jpg.6858e43f86e83c2af710ebe55bea0064.jpg)

![More information about "Scania Multi 03.2022 21.120.0.3 [Multi + ENG] FULL"](https://lymuna.org/uploads/monthly_2022_12/75b7651db96b0ca4f6c6c91ff2b0fbf9.thumb.jpeg.018a971df977c2958a5866b5c8d2d49b.jpeg)


![More information about "CARS TUNING FILES [1/2/3 DPF OFF/EGR OFF/VMAX/IMMO OFF/ECU DUMP ORIGINAL] 2021"](https://lymuna.org/uploads/monthly_2022_11/MOD1.thumb.jpg.1afbe02429520bbfb1e765ac265fb70b.jpg)

![More information about "PACK SOFTWARE IMMO OFF FOR VAG[EDC15,EDC16,EEPROM_V2.0.0,IAW4v1.2,DUMP TOOL]"](https://lymuna.org/uploads/monthly_2022_11/EDC15-EDC16-VAG-Immo-off-Software-1.thumb.png.24eb859f9c6ed3e1c3f49376303c697f.png)

![More information about "New Oroginal Collection Firmwares+Tuning Files[EGR OFF,DPF OFF][STAGE1.STAGE2.STAGE3] 2021"](https://lymuna.org/uploads/monthly_2022_10/464408898_tuningfiles.thumb.jpg.ee8e95e88619751698aba735b1b53191.jpg)


.thumb.JPG.5d7d083f941cbca6ea2ba147871d4789.thumb.jpg.be8ec897dfd37efa693549f01dbb32cb.jpg)


![More information about "PSA Diagbox 9.129 [2022] VMware"](https://lymuna.org/uploads/monthly_2022_06/splash9-129.thumb.png.7f2630a985e7511b30e153c2ffc53335.png)