Coding & Repair Software AUTO RADIO
10 files
-
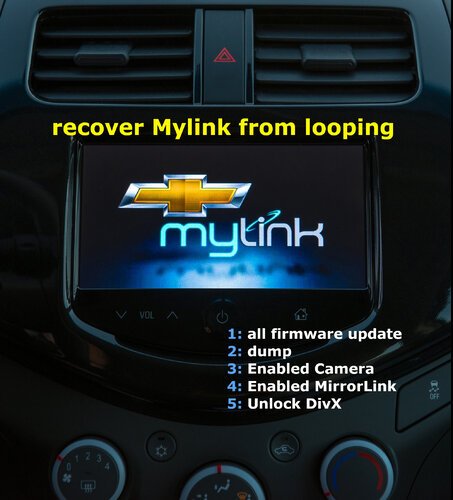
Recovery Mylink& all firmware update +tutorial
By lotfree
Recovery Mylink& all firmware update +tutorial
FIRMWARE MYLINK :
SW 13.01-52065164 SW 20.03-52072018 SW 23.01-42334159 SW 24.1-42341597 SW 24.1-42490772 SW 24.5-42341011 -----------------------------------------
ClientAppInfo
ComparaPastas
Develop Mode.txt
devloper mode code.txt
DUMP MYLINK :
Dump-20.03-52072018 Dump-23.01-42334159 Dump-24.01-42341597 Dump-24.05-42341011 ---------------------------------------
Enabled Camera
Enabled MirrorLink
HexDec.txt
IDAPro
MyLink_Unlock_DivX.avi
Nkbintools
odbg110
Programming Instructions for MyLink.pdf
remote-zip_2
SettingFile
Tools for PenDrive
Video.Out
w971gg6jb_a10.pdf
wincemylink
Tutorial to recover Mylink from looping
HOW TO DOWNLOAD 👇
17 downloads
(0 reviews)0 comments
Submitted
-
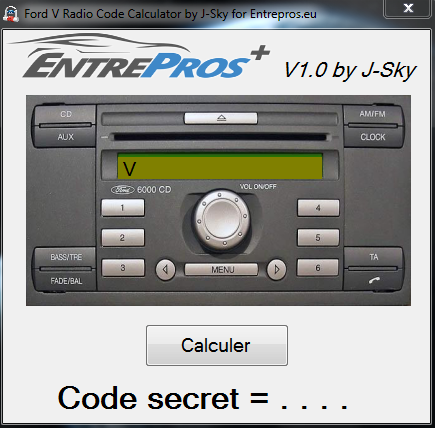
Ford V series Radio code calculator - generator - Unlocked - UNLIMITED
By lotfree
Ford V series Radio code calculator - generator - Unlocked - UNLIMITED
HOW TO DOWNLOAD 👇
13 downloads
(0 reviews)0 comments
Updated
-

RNS510 Startup logo
By lotfree
RNS510 Startup logo
1. Download .iso file what you want
2. Burn to CD (CD-RW, DVD and DVD-RW not worked for me)
3. Insert CD to RNS510 and wait few minutes for setup (if you get CD read error message, just wait few minutes)
HOW TO DOWNLOAD 👇
20 downloads
(0 reviews)0 comments
Updated
-

Audi Aisin navigation RNS-E unlock CD
By lotfree
Audi Aisin navigation RNS-E unlock CD
Product Information
Easy and quick solution to decode Audi A3, A4, A6 RNS-E navigation made by Aisin. No need any mechanical works, take ~5 minutes. Just insert "Unlock CD" and after fast update navigation security code will be writed on navigation screen.
HOW TO:
just set low writing speed:
- If navigation is installed in the car - don't remove it. If navigation unit is removed - connect power supply +12V like in picture:
- Switch navigation ON and on first screen push screen open and eject button. Remove original CD
- Now insert "unlock CD" and wait. Don't disconnect power supply, don't push any button. After ~30 sec. screen will close. In 2 min navigation will restart and in next 2 minutes update processe will start. After ~5 minutes RNS-E will restart again and now on screen serial number last 4 digits is your navigation security code:
Problems reported: on some SW versions is impossible open screen to insert unlock CD, in this case you must do it mechanically. Also this CD works only one time for the same navigation - check maybe serial number last 4 digits is navigation security code? Not work on some very new SW versions and some USA models - but it's very rare in practice.
HOW TO DOWNLOAD 👇
16 downloads
(0 reviews)0 comments
Updated
-
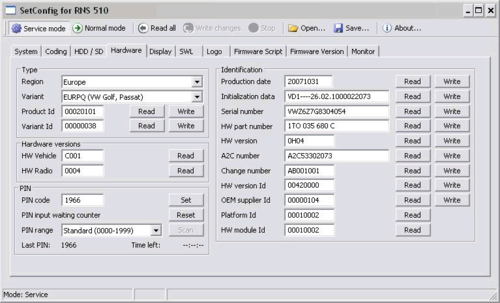
RNS SetConfig for RNS 510 / 810 / 850 / Bentley Continental
By lotfree
RNS SetConfig for RNS 510 / 810 / 850 / Bentley Continental
RNS SetConfig for RNS 510 / 810 / 850 / Bentley Continental
Cloud Mega
RNS SetConfig Version: 2.5.1 & 2.8.1
Software version: 2.5.1
License: professional.
SetConfig is the only product in market which offers possibility to safely work with new hardware versions, including support for C12 H09 and above. It allows to identify the troublesome units, and there is a special fix procedure for them, after applying it is possible to change the PIN code and all identification data with SetConfig or even with any other tool. But if the unit was damaged and it is not able to boot, then the S29AL016 flash on motherboard must be reprogrammed with external EEPROM programmer and then SetConfig can be used to erase the NAND memory.
Supported:
RNS510
RNS810
RNS850
BENTLEY CONTINENTAL
Hardware for SetConfig:
hardware based on original FTDI chip (not blocked after FTDI driver update) and original VW 26-pin connector (part number: 7L6 972 726)
Operation description:
Connection goes through 26-pin connector.
USB-RS232 Cable pinouts:
26-pin connector pinouts:
Pin 1 – TX Data
Pin 2 – RX Data
Pin 14 - GND
How to use:
1. Plug power connector to RNS, if you connect RNS on the table.
2. Connect SetConfig cable to pinouts.
3. Launch the software. SetConfig automatically connects to RNS.
HOW TO DOWNLOAD 👇
127 downloads
-
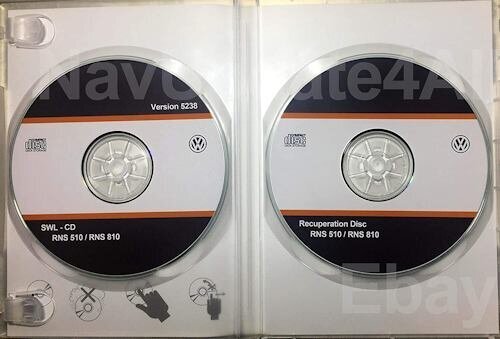
RNS 310/510/810 Firmware & Software
By lotfree
RNS 310/510/810 Firmware & Software
note : In some rar file is password
passwords is : mirdochegal
alleshateinende
RNS 310 - Firmware ------------------ RNS310 Firmware Update RNS 310 Unlock CID CAN_Bus_fix_for_old_gateways1200gw_all IM Freischaltung_swl_vim RCD 310_510_NEC D70F33xx Software RNS 510 - Firmware ------------------ 0900 Update 1020 Update 1022 Update 1100 Update 1120 Factory 1300 Update 1500 Update 2680 Factory 3810 Update 3810a_noru modifiziert von Josi 3890 Update 3970 Update 3980 Update 4020 Update 4020 Factory 4120 Factory 4120 Update 4120 modi 5218 Factory 5230 Factory 5239 Original 5238 Update modifiziert von Josi 5269 Update 5270 All device 5270 VIM Testmode 5274 Update 5274 update 6270 Update 6276 Update 6276 C14 VIM CAN_Bus_fix_for_old_gateways1200gw_all RNS510 Code Finder Setconfig-for-rns510
RNS 810 - Firmware ------------------ SW_0204 SW_0210 SW_1222 SW_1230 SW_2198 SW_3218 SW_4270 SW_4274 SW_4276
HOW TO DOWNLOAD 👇
168 downloads
(0 reviews)0 comments
Updated
-

TUTORIAL FOR RLINK 2 UPDATE
By lotfree
TUTORIAL FOR RLINK 2 UPDATE
Compatible cars: all the Renault cars with RLink 2 and 7” or 8,7” display
AVAILABLE UPDATES
*versions 2.2.15.703 and 3.3.15.41x are NOT updatable manually but only at the Renault workshop
CARPLAY AND ANDROID AUTO ACTIVATION
*CarPlay and Android Auto are on half screen on 3.3 and 7.0. Full screen only on 8.0 and 9.0
DON’T UPDATE FROM 2.2/3.3 TO 7.0 OR LATER MANUALLY BECAUSE THE SYSTEM WILL NO LONGER
WORK CORRECTLY. This is possible only in the Renault workshop because the boot file will also be updated.
This is essential for correct operation and not possible in other ways. Do each procedure at your own risk,
in the event of a system failure you will have to replace the RLink in the workshop.
------------------------------------------------------------------------------------------------------------------------------------------------
Update procedure valid for ALL versions
-Avoid jumping from 7.0 to 9.0 but follow the serial order like from 7.0 to 8.0 and after 9.0
-Download the update file from the links below and unpack it (file in .lgu format)
-Format an USB stick from 8Gb to 32Gb in FAT32, create an R-LINK folder and put the update files inside.
Flash drives larger than 32Gb will not be recognized.
- Car engine on, disconnect any BT phone and remove any other SD or USB card present.
-Insert the USB stick and press update in the message that appears on the screen. The system reboots a
couple of times and installs everything by itself. The last restart takes about 45 seconds. DO NOT TURN OFF
THE CAR AND DO NOT REMOVE THE USB KEY UNTIL THE SCREEN REBOOTS AND SWITCH ON.
------------------------------------------------------------------------------------------------------------------------------------------------------------------------
UPDATE FROM 2.2.x TO 3.3.16.98x
Also valid for updating from 3.3.16.94x/3.3.16.96x to 3.3.16.98x
-----------------------------------------------------------------------------------------------------------------------------------------------------------------------
UPDATE FORM 7.0.24.1xx TO 8.0.32.50x
----------------------------------------------------------------------------------------------------------------------------------------------------------------------
UPDATE FROM 8.0.32.x/9.0.33.43X TO 9.0.34.61x
------------------------------------------------------------------------------------------------------------------------------------------------------------------------
RESTORE FROM 3.3.16.x TO 2.2.19.300
Must be performed if you have updated from 2.2 to 3.3 manually and now you want to have the
system updated in the workshop to 7.0 If you do not go back to the native version of your system
it will not be possible to update it in the workshop.
----------------------------------------------------------------------------------------------------------------------------------------------------------------------
all download links available in a file text
HOW TO DOWNLOAD 👇
13 downloads
(0 reviews)0 comments
Updated
-

RNS 510 Manager MRM 7.18 PRO + RNS510 Code Finder
By lotfree
RNS 510 Manager MRM 7.18 Pro + RNS510 Code Finder
MRM Profi (Service tool for Video In Motion, PIN change, Serial Nr. config. HDD, etc. ...) is a top version of the MRM that feratures service and complete management of Volksvagen / Skoda / SEAT navigation systems, which includes:
* Volkswagen RNS 510 (MFD3)
* Skoda COLUMBUS / TRINAX
* SEAT MEDIASYSTEM
* RNS-810 and RNS-810(w/GoogleMaps)
* Bentley navigation
Features:
* Video In Motion activator (selectable cut off speed)
* PIN code adjustment
* Car type change (switch between VW, Multivan, Touareg, Skoda or SEAT, toggle EU/NAR/CHN/KR/JAP version, ...)
* Serial number adjustment
* Skin type & Logo config
* TSW Mode Off
* LCD TEST
* Service Menu On
* FW Downgrade enable
* Factory info
* HDD config
* Production date & factory signature config
* DVD Region
New features and enhancements for the newest version 7.18:
* both 2 and 3 partitions HDD functions support
* fast backup/restore of music files: copy MP3/WMA files from HDD to SD and from SD to HDD
* install navigation map from SD card to HDD (map on physical DVD not needed anymore!)
* retrieve map-DVD from HDD (create map-DVD image on SD card)
* change LCD type setting for adapting LCD and motherboard (old CCFL type, newer LED-backlight-type, RNS-810/Phaeton big screen)
* RNS-810/Google and Bentley support (only TSW mode functions)
* new hardware-variants added for "car type" config, now there is a range of 55 (!) variants
* new version of USB drivers with Windows 2K, XP,Vista, 7/32 support, 64bit-unofficial (tests pending)
* warning message when entry TSW mode "Beware FW5238 because of TSW bug!"
New features and enhancements for last version 6.55:
* Serial Nr., VAG HW Nr., Factory ID, ... read & write
* new USB drive for better W7/32, XP and Vista compatibility (Win2000 users please use the old USB-driver version)
* runs smoother on slow computers
* Hungarian language (English, German and Czech are standard)
+all features of past Beta Version 6.03:
* harddisk functions
* LED backlight adjust and "black-screen-issue" tool
* better performance while reading/writing the device
What is Car Type Change?
Every brand of RNS 510 has specific configuration, so for example Skoda Columbus navigation will show Skoda logo, shows the green color scheme and only works with Skoda steering wheel control. However now you can switch this with the MRM Profi.
This will solve the problems with the rearview camera, steering wheel control, communication with the cluster screen (dash panel display), and all other problems, because the device is completely switched to the required config. You can now change Skoda to Volkswagen, Volkswagen to Seat or VW Touareg to Multivan/Caravelle and vice versa.
For the correct function it''s necessary to reload firmware using CD-ROM after changing the configuration. The change will be completed then, including part number identification (for example 1Z0 ----> 1T0).
Advantages of MRM profi:
* no need to add any expensive hardware to the car,
* no CAN filters, no problems with whicle speed information
* do not affect other functions of the navigation system,
* time saving - whole operation can be performed in a few seconds,
* no need to open the RNS device,
* high portabilty,
* works with all firmware versions.
How does it work?
The MRM set consist of two parts - software and USB interface cable.
Operation is very simple:
1 - pull out the navigation device from the dashboard
2 - connect the cable to the computer and the connector on back side of the navigation device
3 - run the MRM software and select requested function (i.e. Video In Motion activation),
4 - disconnect the cable and push the navigation back to dashboard.
Language options!
English
Deutsch
Česky
FRENCH
HOW TO DOWNLOAD 👇
91 downloads
(1 review)0 comments
Updated
-
Vw Harman Technisat Preh Delphi unlock and Activation ! MiB1 MiB2 Mib2.5 Audi Skoda Passat Tiguan Golf.update firmware
By lotfree
Activating voice control.Apple CarPlay.Google Android Auto. cp off, patch.updating the firmware of MIB2 / MST2 Delphi
To activate the voice assistant you need:
- Laptop
- VAS5054, VASYA or something that can change the encoding in the block
- SD card
- USB network card D-Link DUB-E100 b1, c1, d1 (E - does not work, checked)
- Time
- A little courage, because having failed or done something wrong, get ready for the expense of $ 400 +
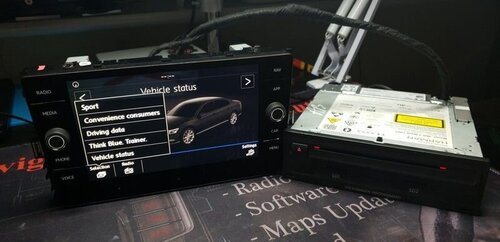
1) The first thing to do is to check that you have the Delphi module.
To do this, you need to hold the "Menu" button on the GU (head unit) for a few seconds, after which you will go to the service menu, where the "Update" section you can see the current version of your module and the type of module.
From the photo you can see that I have a Delphi module, because in the line "Train version of the installed software" at the end is put "D"
Decoding:
MST2 = MIB2 standard deviceEU
= European versionVW
= carP0890
= Firmware 0890D
= Delphi Unit
If there is a letter D at the end of the SW Train version, then you have a Delphi module. If you see the PQ or ZR after the make of the car or the letter T at the end in the SW Train version, then you have a Technisat Preh device. 2) Updating the module from 0890 to 0891The
3) Activation of "Green Engineering Menu" in the service menuTo
do this, take the wire (In my case, Washu), go to Block 5F → Adaptation
> Developer mode → activate
login-password 12345
4) Activate Telnet connection to connect USB network cardAfter
performing steps 1,2,3, you need to enable Ethernet.
To do this, go to the service menu, then to the → "Green Engineering Menu", then → "debuggung mlp" and select the "Ethernet" item.
After execution, it is necessary to reboot the GU, done by holding the shutdown button for at least 10 seconds.
After rebooting, go back to these partitions and tick the "Switch to MLP" section.
5) Set up an Ethernet connection and check the correct connection
Now you need to establish a connection between the GU and the laptop, for this it is necessary that the PC is in the same subnet with the GU.
Connect our USB network card to the GU auto and to the PC and make the following settings:
If everything is done correctly, the green LED on the adapter will light up.
open puty
Start and configure the connection:
the IP address is taken from the green menu, usually by default 192.168.1.4 with port 23.
Next, connect and see the login request.
Only the "root" user is required to log in to Delphi Units.
6) BACKUP
This procedure can be divided step by step, but everything was done for us a long time ago and everything will be done very simply!
Take the script MST2_backup.sh and copy it to the root of our pre-formatted SD card in FAT32. Insert the card into the slot under the glove compartment cover, wait for gu to say that it has read the card.
Next, in PuTTy Mount the SD card with the command:
cd / && mount -uw /sdc1/ Should see:
# MST2_backup.sh
ROOT access — OK
Making backup dir on SD Card — OK
mkdir: /sdc1/backup: File exists
SWaP *.fec files backup — OK
backup /ffs/etc/* — OK
cp: Can't create FIFO file (/sdc1/backup/script.fifo)
delphibin.ifs backup — OK
InstallationManager backup — OK
SWaP engine backup — OK
cp: Dest (/sdc1/mst2_patch.sh) must be a dir to copy dirs or multiple files to it.
profile backup — OK
MHConfig.cfg backup — OK
fs0 backup — OK
Saving unit info to file — OK
emmc serial numbler — SAVED
FINISHED — You can now remove SD Card
7) Fix FEC.Patch FEC codes
Remove SD card and put it back into the laptop. Go through the backup/pg path where our current file with the *.fec extension lies.
You can correct the FEC file with MIB2 Delphi FEC Generator from XTR3M3
It is important when fixing a FEC file to note everything, not only what you plan to activate.
Next, we throw the corrected file into the root of our SD card.
fsc = "00030000" # AMI
fsc2 = "00030001" # Gracenote
fsc3 = "00040100" # Navigation
fsc4 = "00050000" # Bluetooth
fsc5 = "00060100" # Vehicle Data Interface
fsc6 = "00060200" # Skoda/Audi Connect, VW CarNet
fsc7 = "00060300" # Mirror Link
fsc8 = "00060400" # Sport HMI
fsc9 = "00060500" # Sport Chrono
fsc10 = "00060600" # LogBook
fsc11 = "00060700" # Online Services
fsc12 = "00060800" # Apple CarPlay
fsc13 = "00060900" # Google Android Auto
fsc14 = "00070100" # SDS
fsc15 = "00070200" # SDS for Nav
fsc16 = "00070400" # Digital Voice Enhancement
😎 Activation of SWAP codes with fixed FEC and Patch FEC codes.
To download the SWAP code you need to take the desired file, each SWAP belongs to the type of your
DWONLOAD SWAP:
STD2PQ
STD2
NAVPLUS
Next, insert the SD card into the car and make the following commands in PuTTy:
Mount the SD card
cd/ && mount -uw /sdc1/ Run the script (MST2_patch.sh)
cd / && /sdc1/MST2_patch.sh Should see:
# mst2_patch.sh
ROOT access — ok
SWaP patch — ok
cp: Copying /sdc1/SWaP to /home/mmc0t177_tmp/apps/bin/SWaP
100.00% (xxx/xxx kbytes, xxxx kb/s)
FINISHED — You can now remove SD Card
Reboot the radio with a long press on the power button - NECESSARILY!
After turning on the radio, you need to patch, for this in PuTTy:
Download the script MST2_fec.sh.
Mount SD card
cd/ && mount -uw /sdc1/ Should see:
# MST2_fec.sh
ROOT access — ok
*. FEC installation — okmkdir
: /home/mmc0t180_tmp: File existsFINISHED
— You can now remove SD CardReload the receiver with a long press on the power button —
NOTE
some reason it did not work, then you did not fit the SWAP file, try another SWAP
It may happen that FEC files are still in the buffer in the device and are still available after a reboot.
They may need to be deleted several times until they are no longer available on the device after rebooting.
rm -RVf /Persistence/SWaP/ppw/
rm -RVf /Persistence/SWaP/illegal/
You can then import the corrected FEC file.
cp -VRf /sdc1/*.fec /Persistence/SWaP/pg/
After entering the commands, a full reboot is required.
After all the steps, be sure to check the health of the GU.
Check the scanner for errors, and remove them if they appear.
Command:
cp — copyrm — deletechmod — change permissions (e.g. chmod 777 = full read/write permissions) mkdir — create directory (folder) mount — mount pathumount — unmount mount path Attributes:
-f - Forced (Overwrite /Forced)
-R - Recursive (e.g. content folder and copy/delete subfolders)
-t - Mount Request / Special Type (e.g. followed by qnx6)
-u - Update (Remount)
-V - Progress
Bar-w - Read/Write Permissions (when mounting)
HOW TO DOWNLOAD 👇
26 downloads
(0 reviews)0 comments
Updated
-

MIB2/MST2 Delphi Patches (CP Off + SWaP)
By lotfree
MIB2/MST2 Delphi Patches (CP Off + SWaP)
These are the delphibin.ifs (CP Off) and SWaP files for MIB2/MST2 Delphi devices.
Included SWaP patches:
MST2_EU_AU_P0673D MST2_EU_VW_P0213D MST2_EU_VW_P0225D MST2_EU_VW_P0227D MST2_EU_VW_P0231D MST2_EU_VW_P0628D MST2_EU_VW_P0635D MST2_EU_VW_P0640D MST2_EU_VW_P0642D MST2_EU_VW_P0867D MST2_EU_VW_P0870D MST2_EU_VW_P0876D MST2_EU_VW_P0879D MST2_EU_VW_P0891D MST2_EU_VW_P9122D MST2_US_VW_P0635D MST2_US_VW_P0867D MST2_US_VW_P0879D Included CP Off Patches:
MST2_EU_AU_P0840D MST2_EU_AU_P0962D MST2_EU_VW_P0213D MST2_EU_VW_P0231D MST2_EU_VW_P0624D MST2_EU_VW_P0635D MST2_EU_VW_P0640D MST2_EU_VW_P0642D MST2_EU_VW_P0757D MST2_EU_VW_P0867D MST2_EU_VW_P0876D MST2_EU_VW_P0879D MST2_EU_VW_P0891D MST2_EU_VW_P9122D MST2_US_VW_P0635D MST2_US_VW_P0867D MST2_US_VW_P0879D HOW TO DOWNLOAD 👇
52 downloads